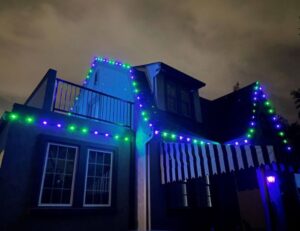
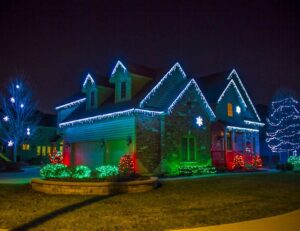
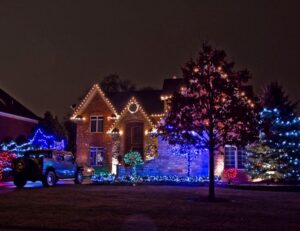
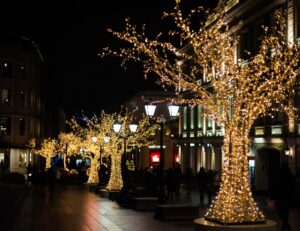
Christmas lights installation requires professional help. If you are planning to hang outdoor Christmas lights yourself then you need to take care of your safety and follow some tips that professional Christmas light decorators use for outdoor Christmas tree lights installation and decoration.
It’s always better to plan where to start, select lights to use, and get the tools needed for a safe and hassle-free installation process.
Here are some of the best professional outdoor Christmas tree lights installation tips:
1. Have a master design plan
Have an idea how your home will look like.
In everything you do, you should always have a master plan. When it comes to installing Christmas tree lights, you have to create a master plan that will guide you through the installation.
The first step is to take a picture of your house from the streets. You want to know how your home looks when viewed from a distance so that you choose the most suitable elements.
Know the house focal point
Highlight all the architectural features of the house that you can use for decorations. You can consider stringing lights across posts, windows, eaves, and doors.
Also, consider hanging some lights on the backyard, trees, window boxes, and bushes. Don’t forget to choose the most appropriate light for stand-alone figures.
Take measurements
Use your lighting master plan to estimate the number of light bulbs you will need for your house. Choose a standard distance to space the bulbs. You can go for standard-size bulbs (C7-C9) that are spaced at least 6-8 inches apart.
When bulbs are evenly and widely spaced between each other, it allows light to spread to a larger area.
2. Get the lights ready
When you finally have a master plan for light installation, you should now prepare your lights for installation. Here is what to consider:
Safety first
When buying your light bulbs, you should go for those rated for indoor and outdoor use. Also, choose the UL- approved extension cords that are suitable for outdoor use only.
The lights you choose should also come with information on how many strands you are allowed to connect and the length of a string.
Inspect the lights
Ensure all the lights you are about to install are working perfectly. Also, confirm that all the cords are working correctly. A single damaged cable can ruin your entire light design. Therefore, you want to ensure all the electrical is working before you can install them.
The light bulb color
What color do you prefer for Christmas? If you are going for white lights, you should know that they are not the same. Most white lights have a bluish tint, and incandescent bulbs have an orange tint. Lights can also vary based on how old they are and the manufacturer.
Clips
Forget about clothespins, nails, and pins used in fixing morning lights. You should always go for plastic clips because they are inexpensive, easy to fit on the roof, and can accommodate any size of light strings. For more help on Christmas lights installation on roof, read this tutorial.
In addition, plastic clips are all-weather and won’t damage your roof and other places you install the lights. Always read the clip package to find out if it fits your specs.
Type of light
What type of light do you want to install? There are various lights and colors in the market, so you can choose one that suits your home exterior and interior.
When you choose different light colours, you have to group them to bring out the décor. For instance, use white lights on the bushes and color lights on the trees. Also, use some white icicle lights on the roofline and entryway.
3. Install the lights
It’s that time to install the lights. Get all your tools and materials ready for the job ahead. Gather everything you will need for the job together to reduce unnecessary movements.
Don’t forget to have a helper. When you kick off, you should start with bushes, trees, windows, doors, and roofline in that order.
Step 1: Light check – you should find out that all the lights work perfectly before installing them on the roofline. You don’t want to have burnt lights hanging on your roofline in the cold winter. Attach the light clips facing the same direction.
Step 2: Install lights on the shingles and shutters – Use an all-purpose light clip to attach lights to your roof gutter. Always hang the lights facing down and clips facing one direction. Use the plastic clips to attach the lights to shingles if you don’t have gutters in your home.
Step 3: Attach more lights on the trees – Use a light hanging pole to hang some lights on the tall trees. If you are afraid of ladders, you can get yourself a hanging pole for the job.
Step 4: Install on the railing – check the deck clips first if you want to install the lights on the railings.
Step 5: Set your time – If you want to save some money on electricity bills, you can move ahead and set your timer. You don’t want to wake up and find your string lights on. Instead, plug the string lights into an outdoor timer. Some timers come with light sensors that will automatically turn on in the dusk.
Hire a professional to install Christmas tree lights
During the festive season, you may not have all the time to buy and install Christmas tree lights. If you are working on a busy schedule this holiday, the best you can do is to hire a professional Christmas tree light installer for the job. Here is why you need a professional to handle your light installation:
- They have the skills to choose quality lights and décor for your house
- Save you time and money when buying light bulbs
- They’ll inspect your home and advice on the right places to fix the lights
- They install and maintain the lights throughout the Christmas festival.
Final Thoughts
Installing Christmas lights in your home is one hell of a task. But, if you’re getting ready for Christmas, all you have to do is follow the tips we have shared here to install string lights the right way.
You can get in touch with American Holiday Lights by calling (630) 769-9999 and we’ll be happy to help answer any questions you may have.
